


Under Construction
Rain gauge case construction

There are one or two ways a case for the rain gauge could be made using sheet aluminium. For example, it could be made from one piece, with four bends with an overlap joint either at a corner or in the middle of one face. The seam could be “joggled” to make it flat.
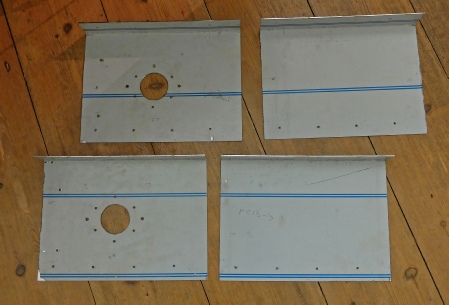
The difficulty with the current project is that the case must fit reasonably accurately round the GRP funnel which has already been made. This would require some pretty accurate bending made the more tricky by the fact that I do not posses a metal folding/bending machine. An easier method (but not so elegant) is to use four pieces of 1.4mm aluminium, each with one bend. Pilot holes are drilled in the flange and the four pieces clamped round the GRP funnel. The pilot holes can then be drilled through and the pieces temporarily fixed together with Cleco clamps.
The Clecos should be inserted as the holes are drilled to avoid any slippage and misalignment of the holes. At this point, I should also mention that it is important to mark all mating surfaces (with a “permanent” marker) to ensure that when the construction is disassembled, it goes back together exactly as before (unless your marking out, cutting and drilling etc is super accurate so that parts become interchangeable!)
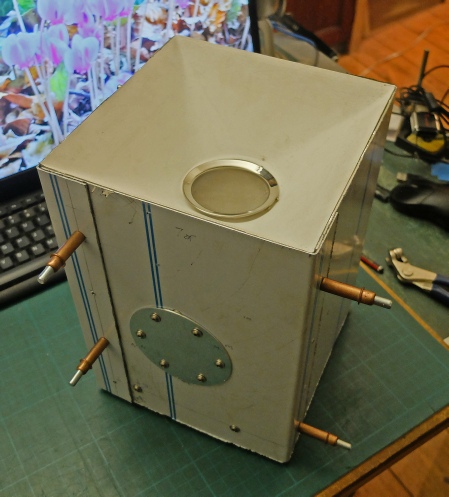
I have cut an access hole on two opposite sides. Behind the large hole I have screwed a piece of 3.2mm aluminium sheet which is thick enough to take holes tapped to M5 thread which I can use to secure the cover plates.
The access holes enable me, if necessary, to guide the funnel into the rubber tube which supplies the tipping buckets. They should also allow me to clean out the buckets (probably with a pint brush) if any detritus collects in them.
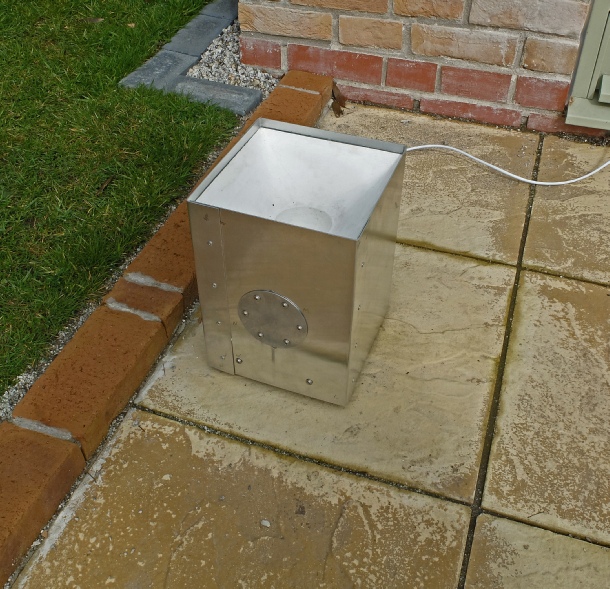
The picture left shows the case mocked up with the funnel at the top and the tipping buckets (unseen) also fitted to check everything fits together reasonably correctly.
You can also see the filter (made from a tea strainer) placed in the top of the funnel. I later spent quite a bit of time gluing this in place with silicon sealant only to remove it later when I decided that keeping it in place would actually make the whole shooting match more difficult to clean. Also, because of surface tension, small quantities of rain water tended to sit on the mesh rather than passing through.
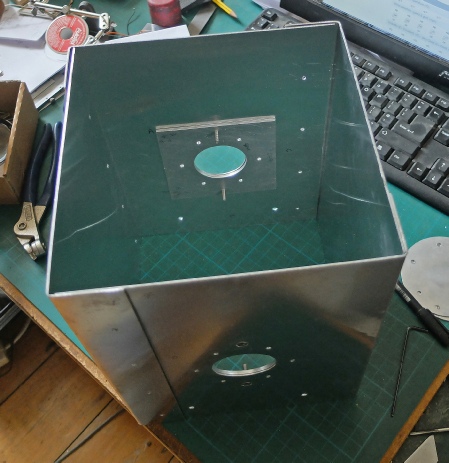
I replaced the Clecos with pop rivets. In this picture, the extra pieces of 3.2mm aluminium with the threaded holes can also be seen.
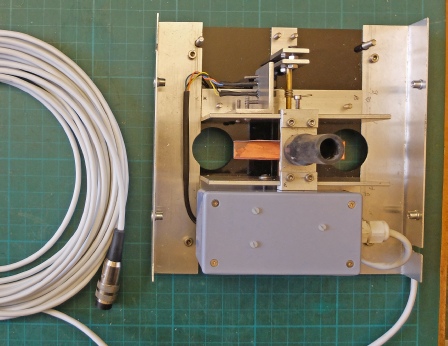
Here a couple of pieces aluminium sheet bent to a right angle can be seen. I used these to join the tipping bucket assembly to the case. Four M5 screws do the job fitting into rivnuts secured into the aluminium angle.
Rivnuts

The funnel was lued into the box with silicon sealant. The three feet (which can also be levelling screws lift the case a few mm above the ground and allow the rain water to easily run away. I haven’t fitted mesh over the two large drain holes in the Perspex base as they can enable the base to be gripped with the fingers and help to manoeuvre it into the case and get the screw holes lined up etc.
My intention is (eventually) to fit the unit un some sort of stand round the back of the greenhouse which will prevent it getting in the way (and getting kicked).
So far, the unit seems to be working as it should and is registering what seems to be the expected quantities of rain.