


Under Construction
More rain gauge construction
Making the funnel to collect the rain water
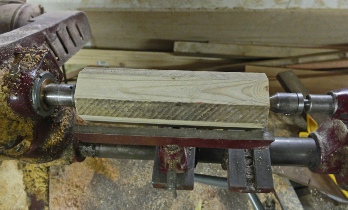
The funnel will be made from GRP. The first stage is to make a plug out of wood round which the GRP will be laid up. Four squares of pine are cut and three bevelled at 45 degrees on the table saw. These are glued together with PVA, then reinforced with screws from underneath.
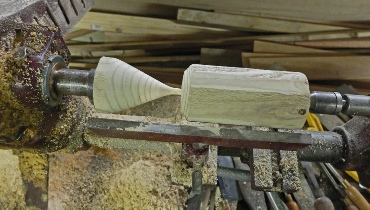
Then the corners are rounded off with a plane. A wood carver’s bench screw is useful for holding the wood to the bench (right).
I turned the bottom of the funnel on a lathe.
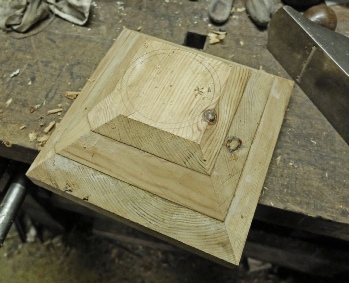
The pyramid was made from an old shelf. It was a beautiful piece of pine -
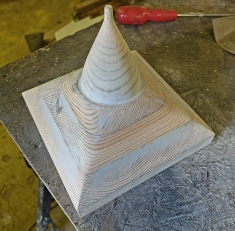
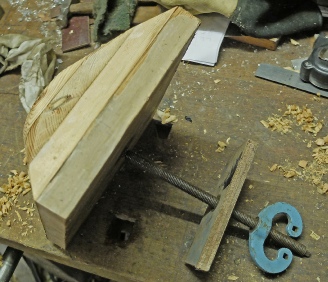
Left, the two parts are glued together and filled and sanded. I used car body filler as a gap-
Next, I applied several coats of grey primer from a rattle can, rubbed it down a bit and applied a few coats of satin white. I then applied a couple of coats of release wax. Finally, I screwed some pieces of waxed, white-
Then it was a coat of white gel coat followed later with some chopped strand mat and resin.
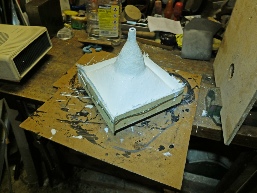
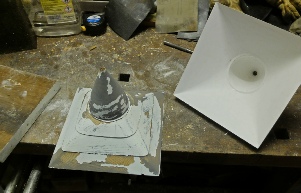
Getting the mould out was a bit of a bugger! In the end I had to pull/force the separate parts of the mould out bit by bit. I should have used more release agent, probably! I often use wax, followed by poly vinyl alcohol sprayed on followed by more wax.
In fact there were I number of ways I could have improved how I did this. I’ll go into this later if I have the time!

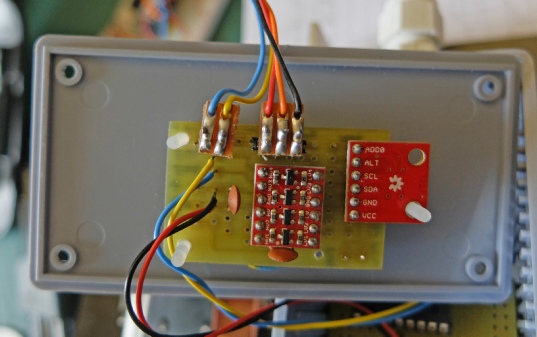
Fitting the circuit to the mechanism and initial calibration.
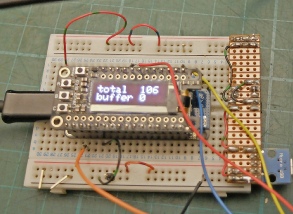
The pcb with the main part of the circuit fits in the grey box which is raised above the black plastic base of the unit out of the way of water (hopefully). The picture on the right shows a simple pcb with a Sparkfun level shifter which translates the 5 volt I2C of the PICAXE/MCP23017 with the 3.3 volt I2C of the Feather which will ultimately control it. I also included a Sparkfun tmp102 board to monitor exterior temperature.
On the left, the picture shows a Feather and an Adafruit OLED Feather Wing plugged in to aid further testing. The OLED Feather Wing displays three lines of tiny but very bright and clear text. I have programmed the Feather to display the total number of bucket flips since reset. This is handy as for testing and calibration, I don’t need to drag a computer along to monitor this number.
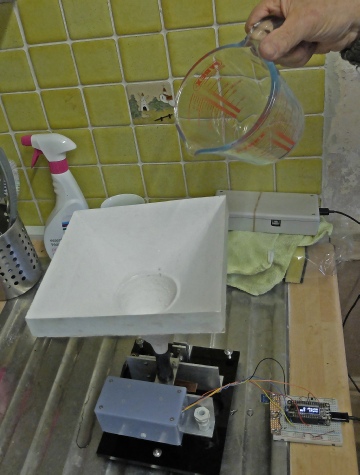
To initially calibrate the gauge, I fitted the funnel to the unit with a short length of silicon rubber hose and then slowly poured in half a litre of water. The result shown on the OLED was 120 tips of the bucket.
I now calculated what amount of rainfall this might represent.
The funnel is 19.7 cm square so its area is 19.7 x 19.7 or 388.09 square cm. Half a litre is 500 cubic cm, so if ‘r’ represents the amount of rain in cm then: r x 388.09 = 500. Divide both sides of the equation by 388.09 gives r = 500 / 388.09 = 1.29 approximately. By a stroke of luck, 1.29 cm is very close to half an inch, so in old money, half an inch of rain equates to 120 tips of the bucket so one inch would be 240 tips and so on.
I don’t think we often get half an inch of rain in one minute so it doesn’t look like the mechanism will be overwhelmed and unable to cope with the rapidity of bucket tips required.
Now I have to make a case for the unit, fit a filter to the funnel to keep out grot and put a mesh over the drain holes to keep out insects.