

The LB-LINK is easy to set up (as an access point) and produces a very strong wifi signal ("5 bars" at 200 metres!) This has enabled us to use wifi in the chalet, greenhouse, garage etc. in our garden as I had hoped. The instructions are difficult to interpret at first glance. Initially, you need to connect the unit by an Ethernet cable (via the POE) directly to a computer. It registers as an insecure connection called "B-LINK_f9ba40" on my unit. You need to access the properties of this connection. Right clicking on the icon (on an old XP laptop) did the trick for me) then you can set the IP address to 192.168.16.100 (and possibly the subnet mask to 255.255.255.0, although it should fill in automatically). Then you can log into the unit with a browser using the aforementioned IP address (using "admin" and "admin") and click on AP mode then change the name of the connection and set a password and a key (password) for the connection. Once you have done that, you can connect the LB-Link to your router and the connection should appear on the list of wifi connections on any device in range. If you log onto the admin web page for your router, the LB-LINK will not appear as a client device (at least, not on my Asus router). However, devices logged onto the LB-LINK wifi connection will appear as if they were connected to the router by Ethernet cable. (I imagine this means that to change the key or SSID, you would have to disconnect the unit from the router and connect directly to a computer via Ethernet.)
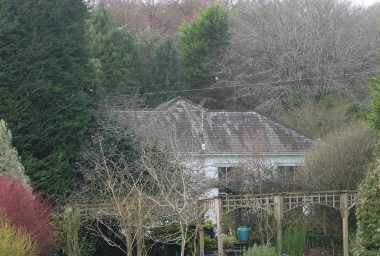
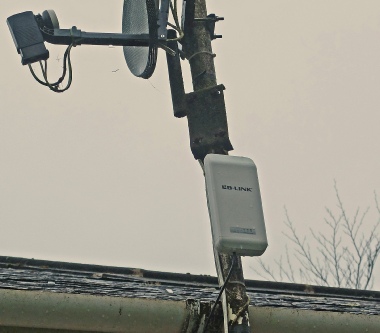
The LB-LINK is a tiny dot in the picture above and a feature on the “communications mast” shown below. In the dark, some flashing LEDs are visible confirming it is working!
I needed to seriously extend WiFi coverage in the garden to be able to communicate with the new greenhouse. Following a Google search, I found the LB-LINK on Amazon. Most of the reviews were good so at only 35 quid or so I thought I would give it a go.
It needs to be fitted to a pole and fortunately we have one already (for some redundant terrestrial TV antennae and a satellite dish). The unit needs to be connected to the router by Ethernet cable (which also needs to incorporate a power over Ethernet supply. Unless your router is just by a suitable window (frame) this is the most difficult part of the exercise! Flat RJ45 cable is very useful here as it can be poked under a carpet.


