


Under Construction
Photographic copy stand
This project stemmed from a desire to digitise some 35mm negatives and slides. I had made a start a number of years ago using a dedicated digitiser. However, when I tried to use it recently, I found that it no longer worked. I might have last used it with my Windows Vista computer which I replaced over 7 years ago so it might have been a case of needing new drivers but, try as I might, I couldn't get it to work with either my old Windows 7 machine or my new Windows 10 PC. Also the case of the copier was covered in a rubbery plastic which had become horribly sticky as they tend to do with age.
So I decided to dismantle it, remove the back light and the negative carriers and try and set up the remains in some sort of support so I could use my camera to copy the negatives. Unfortunately, the macro facility on the camera (Sony RX100 V) doesn't allow it to get close enough to fill the frame so the copies, after cropping would be rather low resolution. A possibility would be a close-
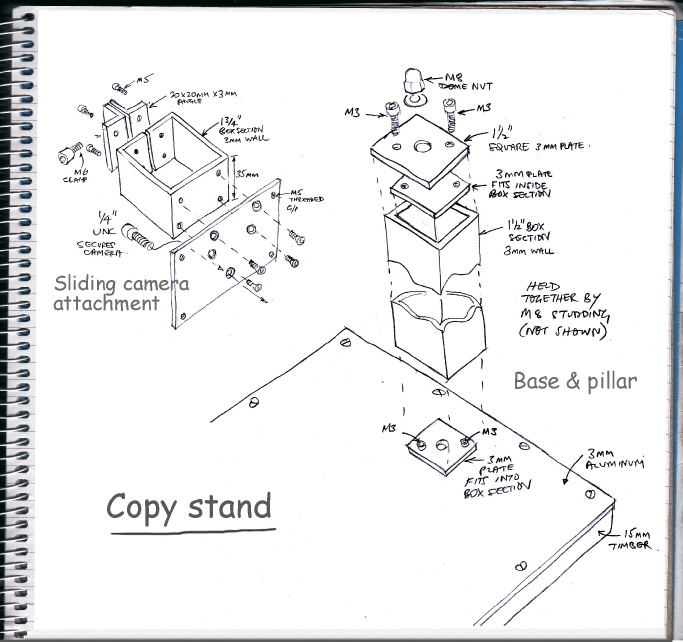
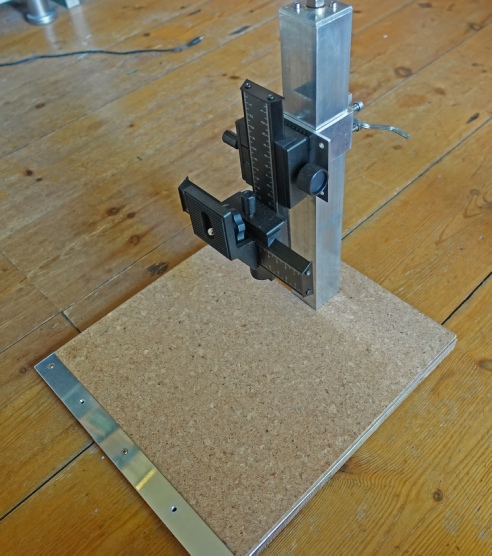
After some thought and a false start or two, I came up with the design shown left. The base comprises a 3mm sheet of aluminium screwed to a piece of timber 15 mm thick. I had a piece of oak from an old side table so I used that. It's nice and heavy and adds stability. The base is 12” x 13”. The main pillar is a piece of 1 1/2” box section aluminium (wall thickness 3mm). The pillar locates on a square of 3mm aluminium cut to fit exactly inside the pillar. This is fixed to the base by M3 screws tapped into the base. In the centre of the locating plate and the base is a 8mm hole for a piece of studding which goes through the pillar through a top plate and another locating plate which locks the pillar to the base as shown in the diagram (except for the actual stud – you will have to imagine that!)
I thought that a 1 3/4” box section with 3mm walls should slide over the 1 1/2” tube (the maths say it should). However, a piece still needed some careful filing on the inside surface to make it fit. Actually, I used a combination of a scraper and a file to try and avoid reducing the ends more than the middle.
Thinking about it now, I feel I could have made a simple jig consisting of a piece of wood with a slot 3mm deep to take the piece of box section. This would have prevented the file from rocking. An alternative might have been a power file (like a miniature belt sander) but I don't have one of those. Maybe next Xmas?
With the tube fitting reasonably well over the pillar, I made a hacksaw cut down what would be the back (see diagram). I then fitted two pieces of angle (see diagram) with a 6mm hole in one and a corresponding M6 threaded hole in the other. By screwing a bolt through these holes, the sliding piece of tube could be locked on the pillar. I then fitted a piece of 3mm aluminium to the front of the sliding piece so that various parts, to be described below, could be attached.
I don't show it in the diagram to keep things simple but the plate is stood away from the sliding piece by using longer screws and a couple of nuts on each of the screws. Also, to save trimming screws (always a pain as they never go easily into the nuts) I used screws together with nuts to secure the angle pieces to the slide.
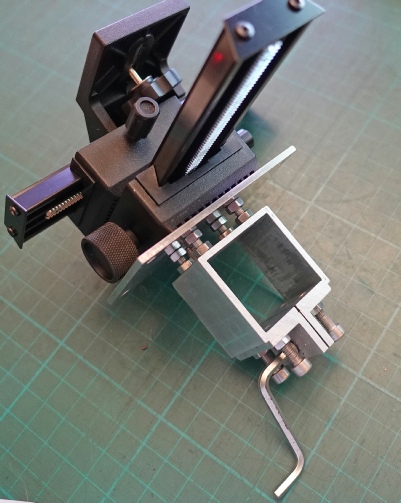
The picture on the left shows this and also the Gurmoir 4 Way Macro focusing rail slider (currently £20.89 from Amazon) attached. This is designed to work horizontally but is just fine moving up and down.
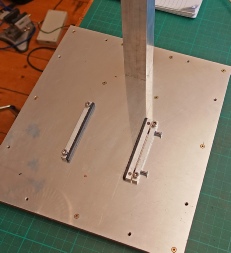
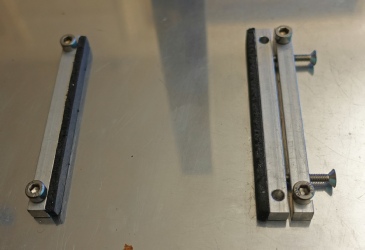
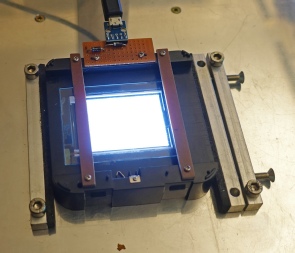
Below left and centre: square section aluminium bar screwed onto the base to grip the remains of the old negative copier, below right. The bars have sponge rubber glued on for a better grip and the rightmost bar has screws to adjust the grip. The remains are, essentially, a light unit and guide for the negative carrier. I have added the thin pieces of tufnol to stop the carrier popping out. The light ran at about 3.6 volts. I have included a couple of diodes in series with a standard 5 volt supply. Each of these diodes drops 0.6 volts so the voltage to the light unit is about right.
Negative copier attachment.
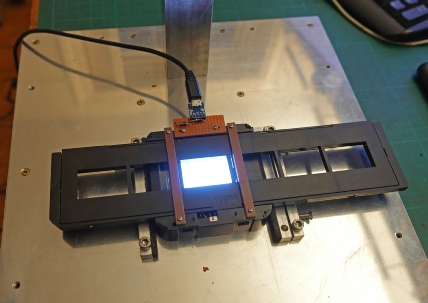
Above: the negative/slide carrier slid into place.
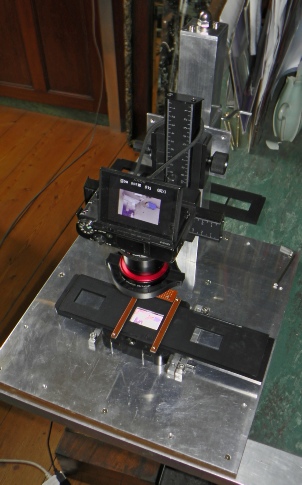
Left: the copy stand with a piece or cork tile as a generat purpose background.